Copied – Cross Platform Clipboard

Copy On Your iPad, Paste On Your Mac

TranscriptPad (iOS only) is by far and away my favorite method of digesting depositions and other transcribed testimony. But, the heavy lifting often gets done on the Mac side.

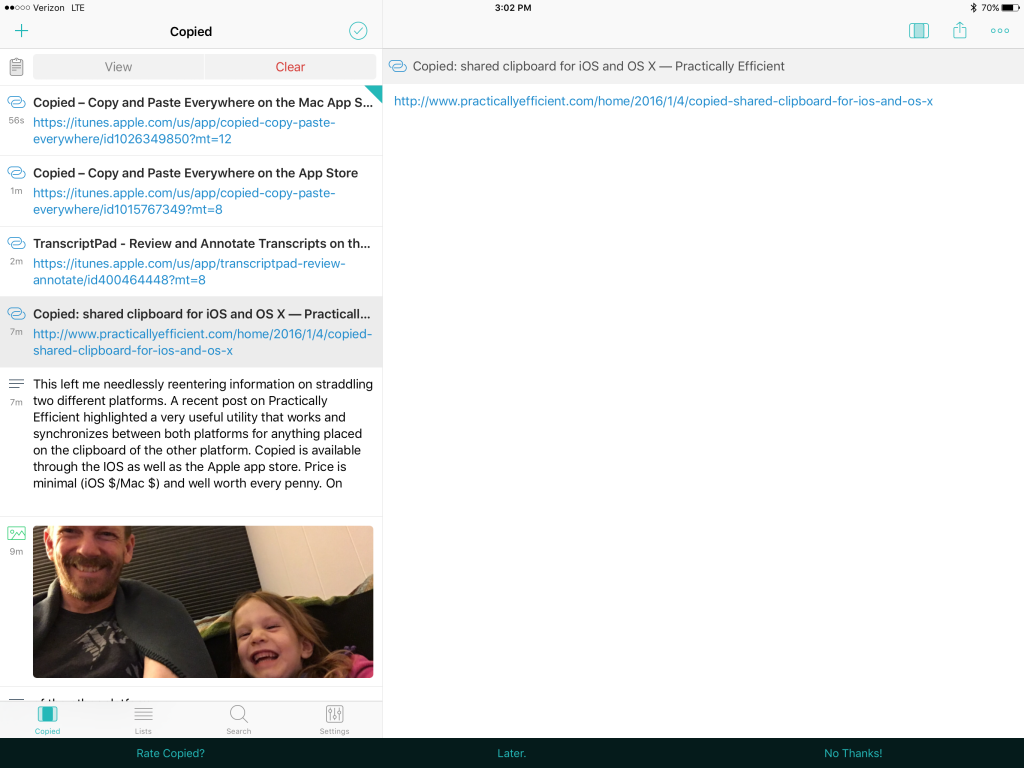
This left me needlessly reentering information, essentially straddling two different platforms. A recent post on Practically Efficient highlighted a very useful utility that works and synchronizes between both platforms for anything placed on the clipboard of the other platform. Copied is available through the IOS as well as the Apple app store. Price is minimal (iOS $1.99 upgrade/Mac $7.99) and well worth every penny. Once installed, anything placed on the clipboard of your iOS device synchronizes via iCloud and becomes Copied Clipboard Manager and Sync iOSimmediately available on any Mac running the software. Additionally, it works the other direction equally well. The utility also incorporates a clipboard manager that stores frequently used snippets of text and any other items that can be copied to the clipboard such as image files and URLs. On the iPad side, Copied includes utilities to transform text, e.g. convert text to upper/lower/title case; remove extra white space; and, find and replace. The ability to quickly format chunks of text on the iPad is particularly useful.
How-To Custom Keyboard Shortcuts in OS X

Quick tip on assigning keyboard shortcuts.

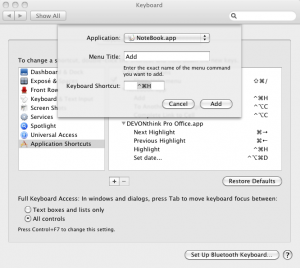
Mac OS 10.6 allows the user to define keyboard shortcuts for virtually any of the menu items contained within applications. A prime example of this is that with the built-in PDF viewer Preview, selecting text and then pressing the key combination control-command-h will result in highlighting of the selected text.

However, other applications such as DEVONthink and Circus Ponies Notebook use a different key combination to achieve the same result. Rather than memorize all the different keyboard shortcuts, set up your own keyboard shortcuts.

Open System Preferences, select Keyboard, select Keyboard Shortcuts, andselectApplication Shortcuts. Clicking the plus sign brings up a dialog whereby you can select the keyboard shortcut to work across the entire operating system, or be more specific to your particular application. Type the menu title in exactly as it appears within the application. Then, with the cursor in the keyboard shortcut box, press the keyboard combination you wish to use for that menu item.

TextExpander and Signatures

MacSparky posted a slick little trick on how to use TextExpander to insert just the link (no http:\www.blahblah.com) in the signature line.  Another nice trick with TextExpander is to use it to insert a signature, literally, into Pages, Word or Open Office documents.

Create Signature

Scan your signature and open in Adobe or Preview. Next, use OS X’s built in screen clipping (shift-command-4) key stroke to clip the signature. Open clipped signature in Preview. Once open in preview, click and hold the little arrow on the select toolbar icon. Choose ‘Instant Alpha.’

previewjhancock

Then, click and drag away the white portions around the signature. This step is necessary so that you aren’t pasting a white block/rectangle into your documents. By erasing the back ground, the text or signature line in the document will still show through the signature. Save the signature as a PNG file with the ‘alpha’ box checked.

Create a Snippet

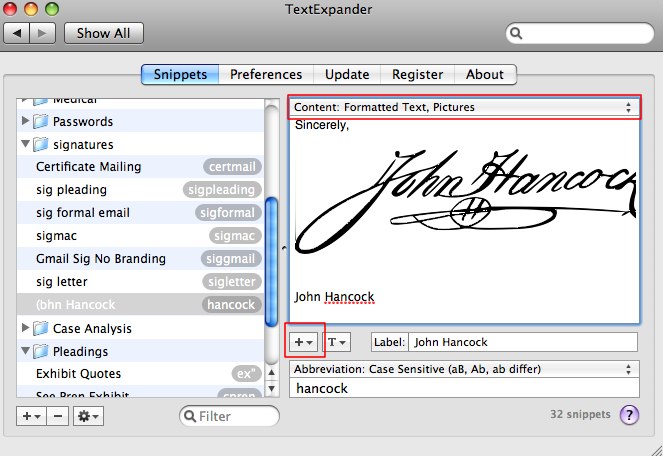
Open TextExpander and create a new snippet with Content: Formatted Text, Pictures from the dropdown.

textexpander-1

Click on the plus arrow and choose insert “Picture.” Choose the file you saved for the signature.

Now, whenever you type your shortcut, your signature will be dropped into the document.

untitled

Spotlight – The Advanced Course

Spotlight quickly finds folders, launches applications, jumps to contacts in address book all with a command-space keystroke and the first few letters of what you want to find/access.  But, Spotlight can go deeper too – filtering folders down to anything you desire based not only on search, but also metadata and through the use of boolean expressions.

Spotlight as a Filter

Spotlight can be accessed from both the command-space keystroke to search the whole hard driver, or through the search box on individual finder windows by hitting command-f (note: if done from a finder window, you must select folder from gray tool bar popup).  Either way, once searching, you can search for more than just text in a filename or inside a document.

In this example, the folder shows all files contained within the folder. In the next screen shot, the same folder has been filtered down to contain just those documents with the label ‘red.’ Finally, using the Spotlight search box, all files have been filtered down files created between 3/1/07 and 8/1/09 AND containing the word “discovery.”

Spotlight as Search Hound

A little language kung fu in your typical command-space search can also yield some great results.  For example, if you are looking for just a contact in address book: (1) hit command-space; (2) type “kind:contact smith” without quotes will bring up a list of all your address book contacts named smith. cursor down to the desired entry, hit return and address book opens.

Similarly, even tasks and events in iCal can be located. Command-space followed by “kind:event deposition” without quotes will call up all iCal events containing the word definition. Now, think about that for a moment. If you get in the habit of using a formal naming convention for events and tasks, you can instantaneously pull up a complete list of all events and tasks for a particular client-matter. Discipline yourself and staff to use Client – Event or Client – Task in the title for events and tasks and you can find them down the road through Spotlight and, of course, through your iCal search function as well.

You can download a complete list of Spotlight search operators from Mac OS X Hints. The Mac OS X Hints post contains an excerpt from David Pogue’s book, The Missing OS X manual which can give you an even more detailed look into how to make this work for you.

Widget Round-Up

On Mac OS X the ‘wow’ and ‘gee whiz’ factor of Widgets/Dashboard make part of the sale…. sorta like cupholders or a slot to hold your sunglasses in a new car. Widgets look really cool, the transition from the desktop to the Dashboard seems 21st Century, but, after using OS X for a while, Widgets kinda fall into the background and get forgotten. Recently, though, I’ve noticed my Dashboard and Widgets get used quite a bit. Here’s the set-up, explanation follows.

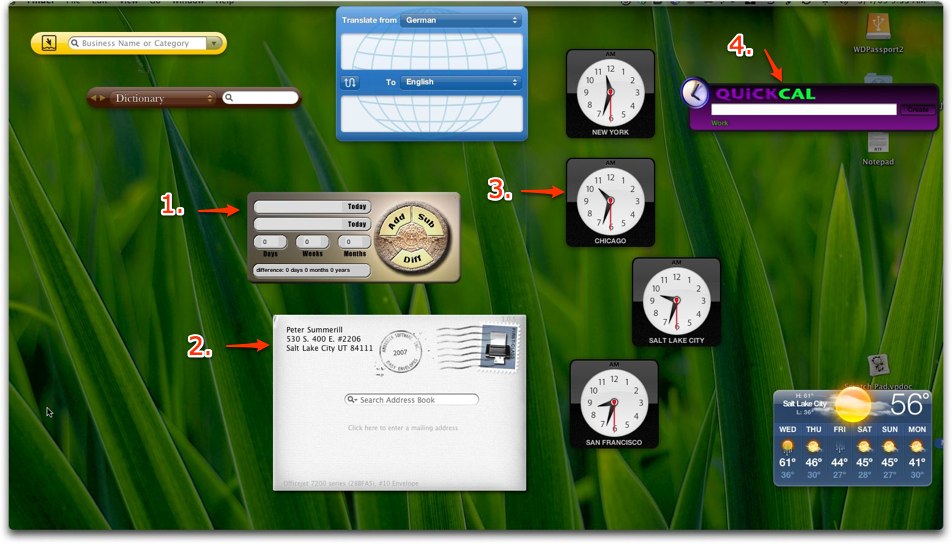
widget-round-up1. Date Calculat0r by Bright Light Software. You can calculate the days between two dates, add dates to a particular date, or count backwards. Great for scheduling orders and discovery cut-off dates.

2. Easy Envelopes by Ambrosia. Previously covered here, great little envelope application that hooks into Address Book.

3. Clock. Built into OS X but duplicated four times, to cover the time zones. Handy to have when trying to schedule a phone conference with someone in a different time zone. Clocks arranged East to West coast and local time popped to the side a bit for highlighting purposes.

4. Quickcal by “Smelly. Puppy.” This widget allows you to enter natural language events and todos on your calendar. Awful handy when combined with the Clock set-up above. Simply type “Phone Conference with Super Expert Next Tuesday at 11:00 a.m.” hit return and it adds it onto iCal. (Donations encouraged. Easy Envelopes and Date Calculator are used as lead in freebies to attract you to the company’s other products. Quickcal is a solo project and a little PayPal could go a long way).

Well, that’s it. If you have a favorite widget or widget workflow not shown here, brag about it in the comments!

Instant Dictionary & Thesaurus Look Up

Old Dog, Old Trick, New Trick

A TUAW blogger recently posted about a ‘plug-in’ that provides the ‘missing’ thesaurus function on Leopard. Chuckling smugly with the self-satisfied knowledge that Mac OS X already had built in Thesaurus (and Oxford Dictionary, and Wikipedia), I scrolled down to the comments only to learn something new myself.

If you command-click (or right click) on a highlighted word you get a choice to look up the word in Dictionary (which also has tabs for Thesaurus and Wikipedia). But, what I didn’t know was that if you hover the mouse over any given word and hit control-command-d, you get this beautiful, useful pop up as seen below. What’s more, moving the mouse around will alter the content of the pop-up depending on which word the mouse is currently hovering on. It almost always seems the commenters have better suggestions than the blog itself…. *hint*. Big ups to TUAW commenter Michael Sternberg for besting the TUAW staff, and me too.

Maximize A Minimized Window.

One of the frustrating things about switching was that doing the alt-tab thing didn’t work on Macs. First, you need to quit using the alt key and switch to the Command key (squiggle). Second, if the window you are tabbing over to is minimized to the dock, Command-Tab won’t maximize the window. All praise blog A New Mac Tip Every Day for digging through the hints at MacOSXHints. Here’s the cheese at the end of the maze:

1. Press Command-Tab until you are on the application you want to switch too.  

2. Without releasing Command, press on Option and then release Command.

3. The window should maximize from the Dock.

Leopard Slickness.

In addition to Vista hate, Mac OS X Leopard’s new ‘help menu highlight’ feature makes switching so much more enticing for shortcut hounds. Where Tiger often left switchers poking around in menus, hunting for that quick way to print, switch tabs, or whatever menu item, Leopard gets there quickly and efficiently. In any Leopard ready application, to find that obscure menu item quickly and easily, hold down shift, command (the ‘squiggle’ next to the space bar) and the “?” key at the same time to access the ‘help’ menu. Now, type the first few letters of that menu item, for example ‘print,’ then cursor down for mouse free access to that menu item.

menu4.jpg


The really cool part is that you can access not only ‘standard’ menu items such as print, but also ‘recent’ documents items and ‘history’ items in Safari.


Safari History

Reformatting Text

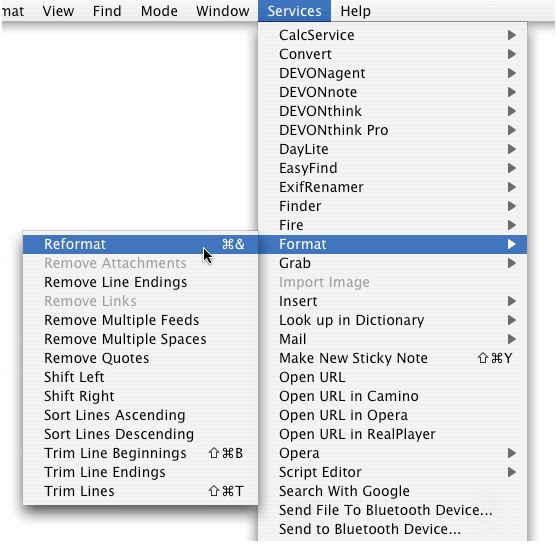
Every litigator (who does at least some of his or her own typing) should know the basics for copy and paste… “shift/alt/command v” to paste and match style vs. plain old “command v.” (FYI the ‘command’ key is the squiggle next to the space bar).But, even the paste special sometimes leaves you hanging, literally, with a whole bunch of bogus line endings, all caps, mixed caps or some other horrid text abomination. Devon Technologies did everyone a favor by putting together an OS X service which reformats text in a snap… WordService 2.7 is a free ‘service’ plug-in that takes away some pain.Devon’s WordServiceWordService CapsOf course, to make your favorite WordService quickly available without too much mousing around, you should map a keyboard shortcut to it in System Preferences>Keyboard & Mouse>Keyboard Shortcuts. So, really it’s a two-fer’ tip here… because you can map any menu item you want to a particular keyboard shortcut, not just services items.Sys Preferences Keyboard Mapping

And the first hint is…

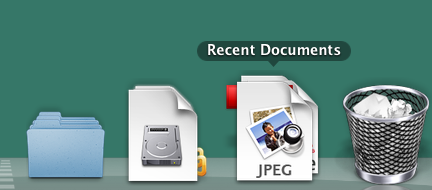
Add a recent documents stack item to your dock for quick access to all your recent documents.Recent Docs StackOpen Terminal and type: defaults write com.apple.dock persistent-others -array-add '{ "tile-data" = { "list-type" = 1; }; "tile-type" = "recents-tile"; }'After that, type: killall Dock in terminal to restart the dock.Finally, control click on the new folder and choose “Recent Documents.”You can set the number of documents remembered in System Preferences, Appearance.via: macosxhints.com