Mac OS X, despite being one of the most intuitive and user friendly OSes on the planet, adopts a very obtuse procedure when it comes to formatting a USB drive. Every single time you get a new USB drive it comes formatted in FAT32. Of course, Time Machine will only work on a drive formatted as Mac OS X. So, pop open Disk Utility, select the drive and hit the ‘Erase’ tab… only to find out Disk Utility refuses to erase a FAT32 drive. Grrr. Instead of the ‘Erase’ tab, select the ‘Partition’ tab in Disk Utility, click the drop down for ‘Volume Scheme’ and select ‘1 Partition.’ Name the disk in the box provided and, on the drop down format box, choose ‘Mac OS Extended (Journaled).’ Hit the apply button, and a pop-up appears warning you that you are about to erase the disk (finally!) hit continue and you are on your way.
Category Archives: switch
Case Analysis Using Journler – The Alternative Approach
Response to using the Applescript for Case Analysis led to some, ummm, issues to say the least. Some people don’t like the Applescript solution because it requires a full license for Adobe Acrobat Pro, others just can’t get the script to load and work properly. So, this last week, the workflow for using Journler in case analysis underwent a hard look and, surprise, surprise… sometimes things get more complicated than they need to be. In short, the following workflow eliminates the need for either Applescript or a full license to Adobe Acrobat and creates a simpler more efficient workflow as well. This entry will also go into more detail about setting up Journler itself, since there has been some confusion on that topic as well.
Occam’s Razor – Cut the script & the cost of Adobe.
The problem: You have a bunch of PDF files (some large, some small) numbering the hundreds or thousands of pages and we both know that there are only few relevant pages in there. The goal is to extract the nuggets of information and gather them in a single place so that they can all be viewed together, including the ability to see them in chronological order as well as filtered by issue, witness etc.
Pre-case analysis document preparation: The first, but not entirely necessary step, should be to OCR the documents. The second, and in my view, necessary step, Bates stamp those documents in a meaningful way. A good start might be to choose the first two letters from the adverse party’s names as the prefix. So, e.g., Smith v. Jones becomes SMJO000001 as a base bates number. You can get a bates stamper here which limits ‘batch’ stamping to 10 files at time if unregistered but is otherwise free.
Pre-case analysis Journler set up: Journler Preferences>Media (Command-,) should be set up so that “When 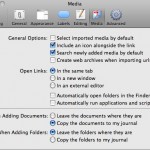
 adding new documents: Copy the documents to my journal” is selected. This will ensure that the document will be copied into Journler, rather than an alias which might later get broken if the original file or folder gets moved. Journler Preferences>Advanced should be set to “Use drop box for fast imports.”
Smart folders should be set up in Journler which, at the very least, reflect the Client/Project Name on which you are working. Typically, I set up a main ‘client’ folder which requires that all items (and subfolders) have the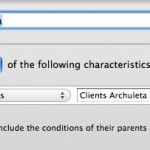 Journler category “Client.” Then, each client gets their own smart folder which requires the client name in the in the Journler category field. You might also consider setting up a sub-folder under the client name to reflect a general category, such as ‘Medical,’ or whatever fits your purpose.
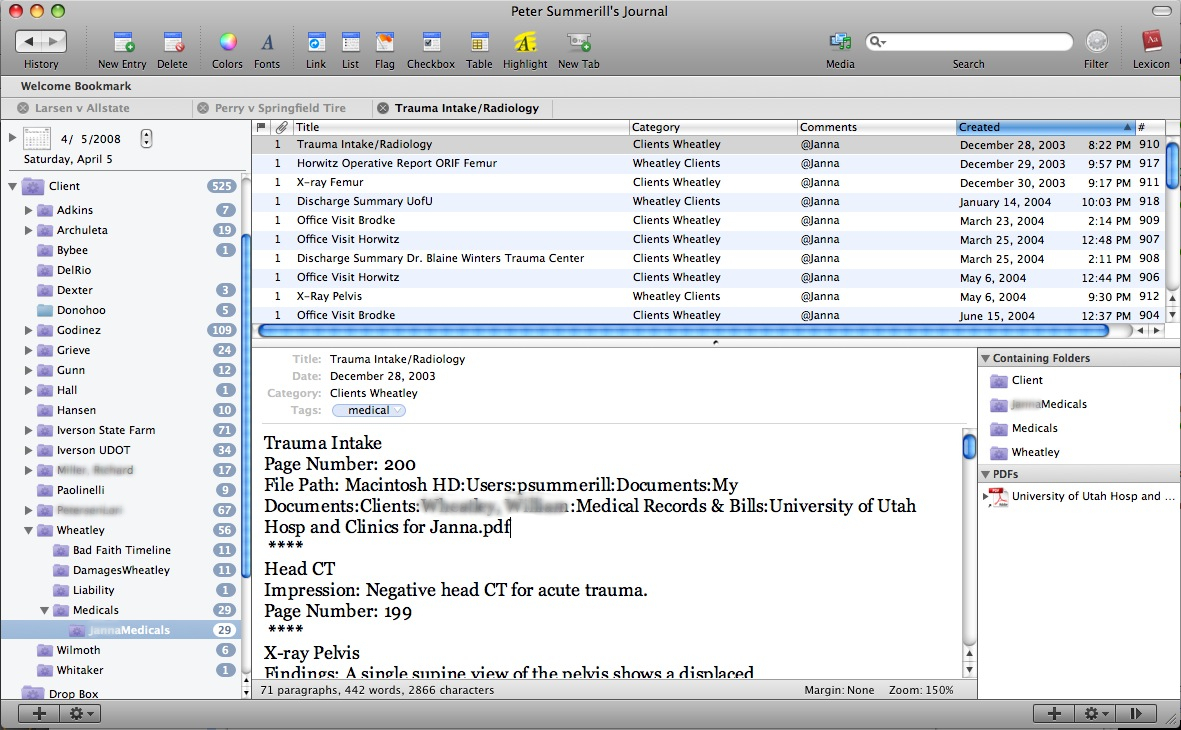
Case analysis: Open your PDF in Preview. When you get to that first ‘relevant’ document there are a number of options for getting it into Journler. If the page has OCR’d text, highlight the relevant text and hit Shift-Command-J. This will open a ‘new entry dialog’ pop-up for Journler. You can chose the ‘smart folder’ where you want to add a new entry and the entry will automatically be tagged and categorized per all requirements of the smart folder and the smart folder’s parent folders. In the example below, the new entry would be Categorized as “Client D__ R__” and tagged as “medical.” Downsides to this first approach include the need to have OCR text available on the page and the fact that the page/document itself does not get copied into Journler for later review. The second issue can be remedied by opening the side bar in Preview and literally dragging the image representing the page into the body of the Journler entry. The drag-n-drop method is nice because it mimics a typical law office workflow where relevant documents are picked out by an attorney and copied/added into a summary by a paralegal.
The second, and my preferred method, is that with the ‘relevant page’ in view, hit Command-c, then hit Command-n. This should open a new Preview window with the relevant page extracted and ready to be sent to Journler. Remember that the bates number is on there, and because Spotlight indexes those bates numbers, you can return to the document/page in its original context simply by typing the bates number into Spotlight. Now, to send this page to Journler hit Command-Shift-S to get the save dialog. Choose Desktop>Journler Drop Box. Doing so will bring up the same dialog as above, but now the page itself gets copied into Journler as a resource.
If you have more than one page, Preview will not allow you to create a ‘new’ document from multiple pages. The solution here is to hit Command-p (or print), choose the page range, then click on the “PDF” drop down in the print dialog and choose “Save to Journler.” This will import the full page range as a resource in a new Journler entry under the same dialog as above. Remember, to get the full print dialog allowing you to select individual pages, you need to click on the little blue down arrow next to the printer selection. Note that there are very few ‘clicks’ and most of the entry can be done using the keyboard, saving valuable time in mousing around.
Finally, and regardless of any of the above methods, hit ‘complete import’ and then switch to Journler. You can edit the “Created” date to reflect the actual date relevant to the entry, add tags, make notes in the body or whatever. You should also explore Journler’s powerful Lexicon feature (quite literally an index of every word in Journler and related entries) as well as Journler’s very powerful search and filter dialogs.
Obviously, this alternative approach is much simpler than the previous Applescript/Adobe Pro method and will work for any item that can be opened in Preview, including JPGs, TIFFS etc. However, since each of those items is often a single ‘page’ you might just want to drag and drop the item into Journler.
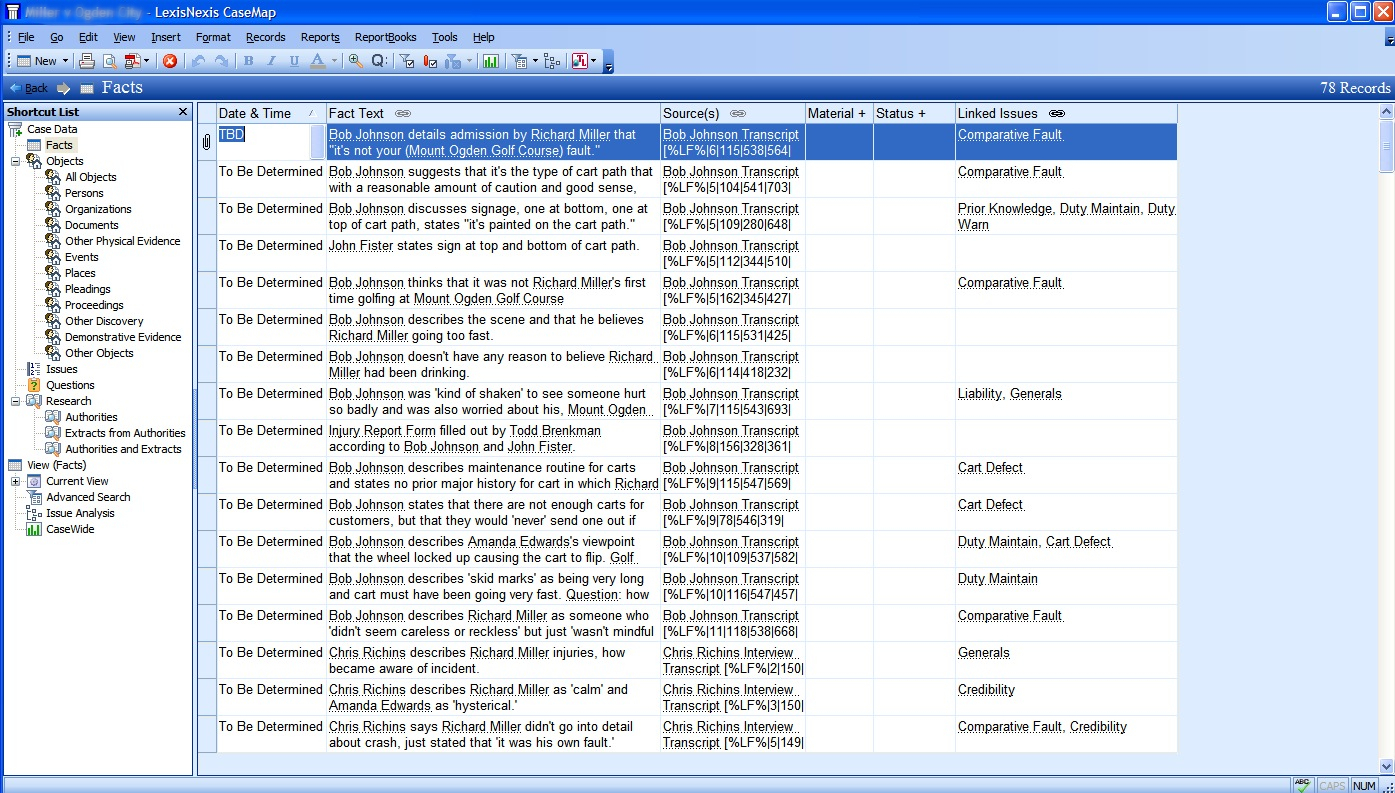
These methods readily grant the Mac using attorney the ability to not only replace Casemap, but to actually exceed Casemap’s analysis. Journler allows you to view multiple entries and cases at once, in multiple tabs. The full text search and free form approach also make it a breeze to customize your analysis well beyond the static limitations of Casemap. Because Journler encompasses all your cases, you are free to re-use information from other cases unlike Casemap’s one-case-at-a-time approach. Further, using Journler need not be the ‘overkill’ that some view consider Casemap to be. Because it can be as simple or deep as you need, Journler is a definite leap forward in case analysis as compared to Casemap.
Open Office 3.0 Beta
Open Office 3.0 Beta is now available for Mac. It is of note because, previously, to run Open Office on the Mac required X11 plug-in and, frankly, felt too clunky, slow and buggy to use. Even though Open Office 3.0 is still in beta, it is an appreciable improvement over 2.x. Took it for a short spin and it does a really great job opening Wordperfect documents, with correct text rendering on-screen, something which AbiWord still can’t seem to get right.
If you’re tired of trudging through AbiWord to open those Wordperfect documents, give Open Office 3.0 beta a spin.
Smug, Perfectionist Mac Users
A survey conducted on 7500 people attending Macworld this last January found that Mac users are:
less modest, and more assured of their own superiority than the population at large.Â
This story, so called ‘survey,’ must die. Â It originally gained some legs in the blogosphere after initial publication. Â However, NPR/Marketplace recently ran a piece on the ‘survey’ reviving the notion that Mac users are pretentious, overly superior, organic food eating elitists who look down on the rest of the world. But the survey cannot really form an accurate picture of the ‘average’ Mac user. Rather, the survey, being conducted on Mac addicts who travelled thousands of miles to stand in line for hours to attend Macworld tells us what the average Mac addict personality is like. I did not attend Macworld.
I am, of course, very self-assured in the superiority of this analysis, and not the least bit modest about announcing that fact to everyone. Now excuse me while I go buy some free-range chicken for dinner.
Windows Collapsing on Itself?
I watched about a year ago as a lawyer was forced to switch his time and billing from a legacy DOS operation into Windows XP because staff could no longer print billing invoices. I may be an ‘early adopter’ for Mac in litigation use, but the extreme of hanging on to old technology out of laziness and fear seems much less appealing. However, for those who love legacy programs like that time and billing in DOS, you might want to read an article on ARS Technica detailing why Windows is slowly but surely dying. In nutshell:
Mac OS X draws “[c]onscientious developers, who care about making an application that looks good, works well, and exploits the capabilities of the OS… Windows [] has never struck me as being like that. The third-party software ecosystem for Windows is … incredibly shoddy. Most Windows applications—from both major software companies and minor ones alike—are ugly, poorly-thought-out, clunky pieces of crap. While there are a few artisan developers for Windows, most Windows devs just don’t care.
So, it is probably correct to say that more and more will ‘switch’ to Mac. The availability of Parallels and VMWare to run your ‘legacy’ Windows apps while transitioning makes it just that much easier. More than anything, virtualization brought me to switch. While ‘playing’ with Mac OS X, I became less and less tolerant of the Windows environment to the point that, well, I rarely boot up WinXP except when needed to get at some bit of information.
From Win32 to Cocoa: a Windows user’s conversion to Mac OS X
Journler… but not journaling.
Â
Don’t Let The Name Fool You.
The name ‘Journler’ doesn’t do justice for what can be done with this software. Although originally designed as a journaling application, the scope of data which this little application can handle goes way beyond any mere journal keeping functions. Journler blends and balances power, customization, flexibility and still retains a simplicity that makes it instantly accessible. The remainder of this post (and a few more to follow) will address how to replace Casemap with Journler, the best thing you can do is download it and play with it.
Â
Casemap Replaced, And Then Some.
Casemap provides a dumping ground for case information, but a very structured and rigid dumping ground. In the center pane of Casemap, you get the ‘meat’ of your data in spreadsheet format. On the left, you can select different spreadsheets for Facts, Issues, Documents, People, Places, etc. Along the top bar, the most important aspect of Casemap is the ability to filter any of these spreadsheets by any of the other items, or even by a single search word. Â So, for instance, you can filter your Fact Spreadsheet to display just those entries pertaining to the person “Joe Smith” and the document “Smoking Gun.” Â
Â
Â
Journler, by contrast, doesn’t come with a predefined left pane or, for that matter, structured data entry into spreadsheets. Casemap has a ‘box for everything’ and everything in its box approach. Â In Journler, the top level on the left is labeled “Journal.” This is where everything goes…. literally everything. Â Unlike Casemap, using Journaler does not require a separate file for each case. Â You can literally dump everything into Journler through the day as you work. Now, in order to focus on a specific case, you create Smart Folders in that left pane. Smart Folders insist that an entry have particular text, tags, comments or categories. Â What’s more, you can take any entry from the main Journal entry, drop it on a smart folder and (with the exception of generalized text) it will automatically inherit those tags, categories, or comments required to become a member of the Smart Folder. Smart Folders can be nested so that a sub-Smart Folder must have all the tags etc. associated with the parent was well as those defined for the sub-Folder. Â What this means is that you can structure Smart Folders as seen on the left, and then use sub-Smart Folders to further filter down the entries. Â Getting interesting, right?
Â
Â
So, to mimic the Casemap functionality, simply create a Smart Folder with attributes that require the entry to contain the tag “Witness” or “Person” or whatever you want. Of course, start broadly, with a “Client” Smart Folder, then subfolders for each client, then subfolders within those to contain the specific data you want to filter on. You can create and destroy Smart Folders at a whim, without ever losing the entry itself. Which, brings us to the entry itself.
Â
Unlike Casemap, all entries are listed in a center pane, but then directly below the entry you get the details of that entry, including the text, any jpgs, pdfs, tiffs, mp3s, web pages. On the far right, you can see the resources associated with the particular entry, clicking on the resource opens it immediately in the main pane. If the resource is associated with more than one entry, you can click the arrow next to it and it will list all other entries associated with that resource. Â
Â
Each entry can be associated with any number of Smart Folders, and can be cross-linked to any other entry. In fact, if you chose the entry name wisely, it will become an automatic WikiWord when entered into another entry and a link is automatically created back to the entry. So, for example, an entry titled Medical Emergency typed as MedicalEmergency creates the wiki link. In order to set up chronologies, use the ‘creation date’ box on the entry to give it the date you desire… in other words, ignore the creation date and use your own date when you want to create a historical chronology of entries that can be sorted by date.Â
Â
Finally, when a particular Smart Folder is selected on the left, only those entries associated with the Smart Folder will be searched and filtered. At the top right of Journler, you can begin typing and Journler begins filtering immediately all those entries which contain any of the text you are typing and it includes the text of resources which have readable text (pdfs, mainly). Further, the filter button next to the search box allows you to filter the entries based on a particular tag, comment, category or whatever.
Â
The Benefits.
Journler saves all data in a non-proprietary text file and is fully Spotlight searchable. By using Journler, you have access to all your knowledge, on past cases, on research cases on other files, right at your finger tips without having to ever open another file to get there. Journler offers a tabbed interface, so you can look, compare, contrast and analyze to your heart’s delight, or until your spouse tells you it’s time to go to sleep. Journler is free for personal use… Yes, free. However, I highly encourage you to pay for it. The developer, Phil Dow, is literally building this software up on his own. A business license is only $34.95 and an incredible bargain. Plus, when 2.6 hits, it will be strictly pay software but you’ll get a free upgrade for having purchased early.
Â
The Limitations.
At present, there are some shortcomings when compared to the Casemap suite. Most notably, an absence of transcript management and bates stamping. Â There are some other little issues, but considering the benefits they mean literally nothing. As to the transcript management problem, stay tuned here as I will be posting an AppleScript in the near future that will make digesting any transcript (or any lengthy PDF) a breeze. As to the bates stamping issue, there is already lots of software out there that allows you to bates stamp PDFs, including Acrobat Pro for Mac. Also, and yet to come, will be a further exploration/explanation of the contextual click options, the Lexicon (woah, just play with it after you have a few hundred entries) and a way to tag without tagging, if that makes any sense.
Â
A Final Word.
Go download Journler, play with it and play with it some more. Drop comments and suggestions here. Visit the Journler forums as they have a huge support base with eager users just waiting to help answer any questions.Â
Game On.
![]()
Journler 2.5.4Â is out of beta and has gone live. This beautiful program includes tagging, categorization, smart folders etc etc etc. MacLitigator has been using this program for sometime and keep your eye here for the complete details on how to use Journler as a fantastic replacement for Casemap for you switchers. Journler’s tagging & smart folders enable you to keep a single piece of information linked to multiple topics while the Lexicon feature indexes all entries and shows relations among your data you didn’t know existed. Â
Â
Get Journler here, get it now.Â
Maximize A Minimized Window.
One of the frustrating things about switching was that doing the alt-tab thing didn’t work on Macs. First, you need to quit using the alt key and switch to the Command key (squiggle). Second, if the window you are tabbing over to is minimized to the dock, Command-Tab won’t maximize the window. All praise blog A New Mac Tip Every Day for digging through the hints at MacOSXHints. Here’s the cheese at the end of the maze:
1. Press Command-Tab until you are on the application you want to switch too. Â
2. Without releasing Command, press on Option and then release Command.
3. The window should maximize from the Dock.
Leopard Slickness.
In addition to Vista hate, Mac OS X Leopard’s new ‘help menu highlight’ feature makes switching so much more enticing for shortcut hounds. Where Tiger often left switchers poking around in menus, hunting for that quick way to print, switch tabs, or whatever menu item, Leopard gets there quickly and efficiently. In any Leopard ready application, to find that obscure menu item quickly and easily, hold down shift, command (the ‘squiggle’ next to the space bar) and the “?” key at the same time to access the ‘help’ menu. Now, type the first few letters of that menu item, for example ‘print,’ then cursor down for mouse free access to that menu item.

The really cool part is that you can access not only ‘standard’ menu items such as print, but also ‘recent’ documents items and ‘history’ items in Safari.

Switch Hitter Help
Moving from Windows to OS X? The Unofficial Apple Website points out OSXhelp “Insanely Simple tutorials for the first time Macintosh user.” According to TUAW, the site should be of great help in explaining all those little things experienced users take for granted. A visit to the site confirms that it shows some promise, including this handy primer on keyboard shortcuts…. A topic always of interest to myself.
Other sites that help grease the switch: 
Apple’s own official Findouthow
and the cleverly titled mackindergarten.
