Review – Oral Argument by TabLit

TabLit software released a new iPad app designed to help attorneys during argument in open court aptly titled “Oral Argument.” TabLit has an intriguing concept, but overall this 1.0 offering lacks execution.

The idea behind Oral Argument is to provide a notepad/outline style presentation of the points you wish to make during oral argument. Each ‘page’ can be very long, formatted in an outline mode, and employ rich text formatting and highlighting. Each page for a particular argument is displayed across the top with a separate tab button. Perhaps the nicest trick is that you can insert a hyperlink style ‘popup.’ So, when arguing and you cite a particular case to the court, you can tap the hyperlink and get a popup with the specific language. In this way, you don’t clutter up your outline, but still have quick access to those special quotes if you want them. The app also provides a sidebar for typing in notes as your oral argument progresses. Finally, the app includes a timer at the top. Courts where I have argued, and which impose a time limit, invariably have something on the podium which tells me how much time is left. So, although novel, the necessity or usefulness of a built in timer is not all that great.

Overall, however, the app shows itself as a 1.0 venture. There is no search feature. Creating outlines requires using an archaic interface reminiscent of  MS Windows’ Notepad application. Adding insult to the tiny icon set of such a text editor, everything must be edited in landscape mode. Changing font size requires a return to the edit mode. Further, editing from your laptop or desktop requires a ‘subscription’ to TabLit’s ‘premium’ service. The app costs $19.99, a subscription based model for getting text into the app will not win over users. Moreover, there is not much to distinguish this app from other note taking apps, including the handwritten variety. In fact, getting an outline into the app is so difficult, it would be easier to create an outline in a word processor, save it as a PDF, and then take notes on that PDF in GoodNotes, Remarks or Notability.

OnLive Desktop

There has been a ton of press about OnLive Desktop and the ability to run Windows on your iPad. There’s a reason it’s free.

While it seems like a great idea on paper, the reality is far from appealing. Not only does the connection frequently fail, OnLive Desktop also stands as a solid reminder just how ugly and unworkable Microsoft Office becomes on a tablet interface (not to mention how unworkable Windows 7 is on a tablet interface).

Compare & ContrastMicrosoft Word OnLive Desktop vs. Pages on iPad

Date Calculator Roundup + Wolfram Lawyer’s Assistant Review

Ahhhh. The interesting tedious task of calculating dates. Delegate to staff and hope they get it right and you don’t blow a statute/deadline? Or, get out a big desk pad calendar and hold your thumb on the starting date counting backwards, then forwards, and forgetting where you started when the phone rings? Here’s a round up of calculators to help make it a bit easier on you or your staff.

On the iPad/iPhone

Court Days Pro ($2.99) is a ‘legal specific’ date calculator that allows you to ‘build’ a set of dates. Dates can be added/subtracted as court days or calendar days and long dependent chains can be built from a single trigger event. If the calculated date falls on a weekend or recognized holiday, the calculation can bump the date forward or backward to the next closest court date. Court Days Pro is handy for creating dates which are usually static and triggered by a single event, such as discovery schedules, time to answer, days until the statute of limitations runs etc. Once calculated, the dates can be exported directly to the built in Calendar app or emailed. You could also check out Court Days (.99¢) made by the same folks, iPhone/iTouch only and fewer features. Both Court Days and Court Days Pro allow adding custom state recognized legal holidays. The reviews for this app on iTunes are somewhat negative. It appears from the negative reviews that people are having difficulty with navigation and input because none of the complaints make much sense if you spend a little time understanding how the app works. Recommend ignoring the iTunes reviews and playing around with the app for a little bit before you give up.

Date Ranger (Free). Date Ranger is really simple on the surface. Two boxes, two dates and you’re off and running. Here’s the neat trick: once you have a date calculated, you can ‘swipe’ that date onto the other box. This makes calculating dependent sequential dates a breeze.

HiCalc HD (Free) offers a variety of handy calculators, including a basic date calculator. It presents the dates in dd/mm/yyyy format which can be a bit confusing. HiCalc also displays the day of the week which will keep you, at least, from calendaring something to occur on the weekend but may result in you calendaring on a legal holiday.

Lastly, DateInterval (free) provides a bare bones, knuckle dragging friendly count days forward from a date or the difference between two dates.

On the Mac

Several free options exist for calculating dates on the Mac. First up is Date Calculator, a somewhat dated (2005?!?!) widget available here. The widget allows addition, subtraction and difference calculations for dates. FreeLawTools offers an online calculator that uses either court or calendar dates for the calculation, and will also exclude legal holidays/weekends from the result by shifting the day forward or backward as you desire. Finally, WolframAlpha. If you don’t already know, WolframAlpha “is an online service that answers factual queries directly by computing the answer from structured data.” So, of course, it can calculate dates.

Wolfram Lawyer’s Assistant (Reference App)

Speaking of WolframAlpha, they have just released for the iPad Wolfram Lawyer’s Professional Assistant ($4.99). The app offers up a unique set of reference tools for lawyers including, among other things, a Legal Dictionary, a quick reference for Statutes of Limitations for all 50 states, blood alcohol calculator, IP Address Lookup, historical weather, damages/estate planning/real estate calculators and statistical information.

The date calculator can calculate business (i.e. court) or calendar days between two dates or forward from a specified date. But, if you want to count backwards… sorry, despite the fact that this App is provided by the world’s most famous online calculation machine, WolframAlpha, it can’t count backwards. Counting to a huge number of decimal places Pi? Check. Counting backwards on your iPad. Meh, not so much.

Wolfram Lawyer’s Professional Assistant also fails in the Statute of Limitations area. For the Utah Statutes of Limitation periods, it lists a 1 year SOL for “medical malpractice actions based on insertion of a foreign object.” Not. Quite. Right. The Lawyer’s Assistant is also a little rough around the edges in terms of user interface. Finally, the thing throws advertising for other Wolfram apps at you in the bottom corner of the home screen. Considering it is a paid app, advertising (even for your own wares) is a major no-no. Final thoughts: wait for the next revisions or corrections to the current version before purchase unless you really need one of the math calculators.

Looking back at this collection it becomes obvious that the paradigm is shifting toward the iPad/iOS for ‘new’ or ‘innovative’ development. The best date calculator to be found is Court Days Pro, on the iPad. A date calculator widget for Mac OSX hasn’t been updated in six years and Wolfram just cranked out an iPad specific app, but provides nothing on desktop for legal reference. Interesting.

Update: 

Fresh from the mind of David Sparks (MacSparky), Siri can also calculate dates (and probably add them to your Calendar too).

Try this.

Siri …

“What is 30 days plus December 7”

“How many days are between November 1, 2011 and December 7, 2011”

Thanks David… just when I had finally resolved to wait for the iPhone 5.

Circus Ponies Notebook + Dropbox = Joy

Just noticed that Notebook for iPad has been updated to sync via Dropbox. Previously, the only way to sync was over the USB drag-n-drop through iTunes run around. Once your Dropbox credentials are in Notebook, you can download and sync pre-existing Notebooks from the Dropbox cloud, or you can designate a folder and upload notebooks created on your iPad. Now that Notebook syncs over Dropbox, this will be my go to outliner on the iPad.

Three Neat Tricks in Mac OS X Lion

Because computers are, in the end, a day-to-day tool used to run a law practice, upgrading to the latest and greatest operating system should be done with care. Look at it this way, if you were the milkman whose job it was to deliver milk every day, you would replace the engine in your delivery truck just for the benefit of a quarter mile per gallon without some reasonable degree of certainty that doing so wouldn’t cause the truck to break down the next morning? Even though the Mac platform is generally solid, there are always those little quirks with each new version of the OS. So, after some delay, the jump into Lion was finally made. The new OS works great and seems to have boosted the speed just a little bit. Because Lion has been out for a while the new features have largely been covered already. But here are three features which have not received a terrible amount of press, but definitely make upgrading for a paltry $29 an easy decision.

First: when you now QuickLook a document in Finder, command-tabbing or switching to another application leaves the QuickLook version open on the screen. This is very handy for referencing a document while typing in another application.

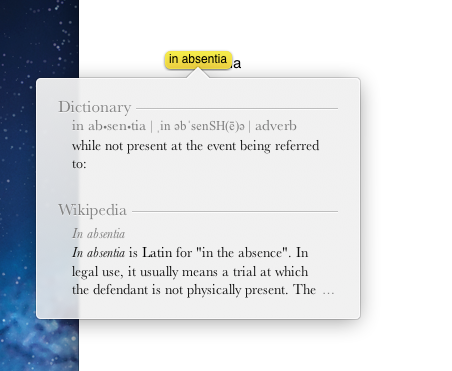
Second: a three fingered double tap on top of any word will pull up the dictionary definition of the word, a thesaurus reference for the word, and, a short version of any Wikipedia reference which may exist for the word.

Third: using Preview to sign a PDF document using the built-in camera on your Mac. This last bit is sure to make any lawyer who prefers working paperless squeal with joy. By simply signing a blank white sheet of paper, and then holding that signature up to the camera, you can then insert your signature into the PDF wherever you see fit.

This is a vast improvement over the old static stamp method of inserting a handwritten signature on documents. Additionally, it provides a heightened sense of security since each signature can now be unique and contained handwritten date notation next to the signature. Once the signature is placed in the PDF, flatten that image and make it a permanent part of the PDF, simply select File>Print>PDF>Save as PDF.

iPad Wireless Presentation

When Steve Jobs announced the iPad he called it ‘magical.’ Magical seemed a bit silly and somewhat corny. Over the past year and a half or so, the iPad offered more and more to the point that it has truly become magical. And that, perhaps, was the genius of Jobs… the ability to see the magic of the future, today.

The recent update to iOS 5 combined with an Apple TV (ATV) software update confirms the iPad as a serious piece of technology easily accessible to everyday folks, and even lawyers.

You can now, from a chunk of aluminum and glass smaller in size than a legal pad, wirelessly display across the room virtually anything that can be shown on your iPad. Need to show a street scene? Stream Google Earth, wirelessly, straight to a projector, pinch to zoom, swipe to tilt. Need to show detailed anatomy? Fire up Netter’s Atlas and present beautifully detailed anatomical drawings with pinch to zoom. Want a 3D anatomy? Do that too with Visible Body, a really great anatomy app that lacks the fine detail of Netters, but wows with 3D zooming, pan and tilt on all anatomical structures. Need to mark up a PDF or photograph? Yeah, you can do that too, live, in front of the jury. GoodReader, ReaddleDocs and PDF Expert all stream a beautiful mirrored copy of your markups. Need to show a witness interview or video of the scene? Check. Wirelessly.

Want present without simultaneously mirroring your actions to the display? At least three apps recognize the ATV as a separate display and retain the iPad display for the user to manipulate the projected image. TrialPad smartly and critically shows only the particular exhibit, treating the ATV as a secondary display and leaving the iPad screen available for markup and annotation hidden until ready to display. Apple’s Keynote presentation program also uses the ATV as a ‘secondary’ display, again leaving the iPad to function as a presenter only screen where you can view individual slides, highlight the slide on display with a laser pointer, or read your presenter notes. iAnnotate can simultaneously show an exhibit on the projector via ATV, while allowing you to reference your examination outline on the iPad itself. Really, really useful stuff and all from two little tiny pieces of technology that seem so innocuous: a slab of aluminum and glass and a small black cube.  Magical.

So, here’s the step by step for doing any of this in a courtroom:

1. An iPad running iOS 5

2. An Apple TV

3. Both devices connected to the same wireless network

4. A projector connected to the Apple TV

The Apple TV uses an HDMI out cable, so your projector will need to be capable of accepting HDMI input (many projectors only accept VGA). Once you have your Apple TV up and running, with the latest software installed, you need to make sure that both the ATV and the iPad are running on the same network. This is the only ‘techy’ part of the whole project and there are three options: First, use whatever wireless network you can find in the vicinity and hope that it is stable and fast enough to support you. Not a very good option, IMHO. Second, and cheapest, pick up an Airport Express and use it to set up a local wireless network. An Airport Express will only set you back about $99 if you pay full retail and can often be found on discount at sites like Other World Computing for as cheap as $59. Third, but not least, set up your MacBook as an ‘ad hoc’ wireless network. Then, connect your iPad and ATV to the MacBook’s ad hoc wireless network.

Once this is all set up, from the home screen double tap the home button or four finger swipe upwards.

Then, swipe the active apps tray in the bottom of the screen to the right.

Now, you should see the AirPlay icon. Tap it and select your ATV and turn mirroring on. Wash, rinse, repeat.

iPad @ Work

David Sparks, aka MacSparky, aka a source of Much Wisdom for All Things Apple and Workflowish, just published a new book: iPad at Work. The book is not quite yet available in Kindle format, but is available on iBooks and even in brick and mortar stores. For any contrarians flaunting the iPad’s ‘obvious’ consumption only device status, David’s book covers the gamut and provides specific app recommendations for education, law, medicine, construction (iHammer anyone?), real estate and IT.

Over the years, David turned MacLitigator (see the homage folks?) on to such gems as Default Folder X and convinced me to even try OmniFocus despite its ugly Getting Things Done by micromanaging your life roots. So, the price of admission is worth it just to see what he considers to be good workplace specific apps.

iPad Note Taking Apps Showdown

The ability to take handwritten notes on an iPad seems like a no-brainer. But, which app to choose? Here’s a showdown of the five most frequently mentioned apps for handwritten notes on the iPad, from least liked to best bet. [UPDATE: Vote for your favorite iPad handwritten note taking app.]
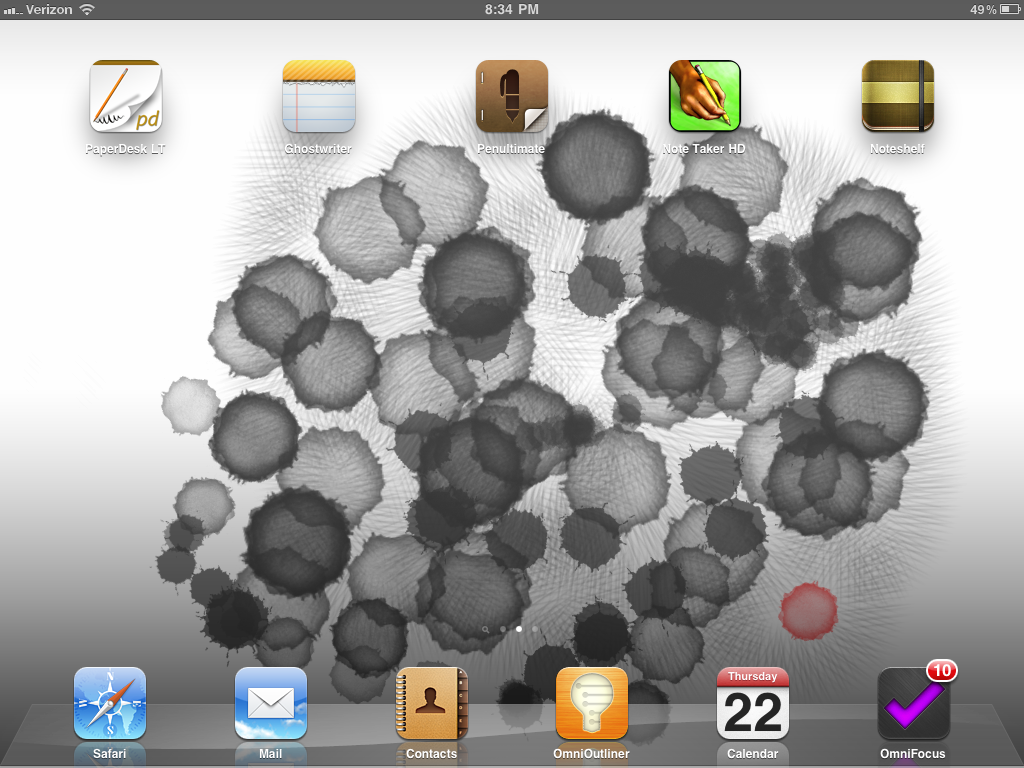
PaperDesk

PaperDesk comes (unlike any of the other apps) in a free ‘lite’ version on the app store, so it may be worth a try to see if it fits your needs. Unfortunately, inking is not very smooth. There is a nice bookmarking feature, and a nice to-do feature including the ability to review all to-dos from multiple notebooks on the home screen. However, the to-do’s do not sync to a particular page in a notebook.

Exporting to PDF requires connecting to iTunes. There is no Evernote integration.

Paperdesk does have the ability to export directly to Google docs. It also includes the ability to use typewritten notes. Typewritten notes, unfortunately, do not wrap around hand written notes and ink almost seems to be a secondary input choice. The keyboard has a nice quick access toolbar for tabs, bullets and math symbols.

Palm protection, the ability to keep your wrist or palm from creating extraneous and unwanted marks on the paper, is weak. The icons and general layout are somewhat goofy and not at all iOS like. There are no discrete settings or preferences. Photos can be imported either from the photo library or the camera.

PaperDesk also includes the ability to record voice notes. However, the keyboard obscures the record button, making it difficult to begin and end recording. Sounds are actually linked to the typewritten words making it quick to jump to any particular point of the recording. For example if you typed out “four score and seven years ago” while recording, and then clicked on the word years, the audio would begin replaying whatever was spoken or recorded at that particular point when the word “years” was typed. This is similar to the functionality contained in other programs such as Soundnote for the iPad, and also replicates, to some extent, the functionality of having a LiveScribe pen. Unfortunately, the recording does not track handwritten notes and tracks only typewritten notes.

GhostWriter Notes.

Ghostwriter ($4.99) notes allows you to take notes either with pen or by typing on your iPad. The interface is much better than that of PaperDesk. There are a number of different papers which can be used and custom papers can be made from anything contained within the iPads photo album. PDFs can also be imported for annotation and markup, a great feature for filling out things such as standardized intake forms. Interface is relatively clean and straightforward, iOS like.

Export options are plentiful, including the ability to export through e-mail, Dropbox, Evernote, directly to a PDF viewer, by printing wirelessly to printers capable of communicating with iOS, as well as sending the note page to the iPad photos album. GhostWriter allows the user to insert blank pages into a notebook, and reorder the pages as you see fit. Each page is given the default description of the current date, but each page can also be renamed to a custom page name. There are, of course, a variety of pens, pencils and highlighters for use within the application. Unlike PaperDesk, there is no audio recording with GhostWriter. GhostWriter employs a zoomed handwriting feature. This allows the user to write with much greater detail than would normally be possible using a stylus or finger on a blank page. However, the ink contained within the zoom box is somewhat pixelated and difficult to read.

Penultimate.

Penultimate ($1.99) is perhaps the most iOS like of any of the applications. It is brutal in its simplicity which, depending on your view, is either the highest selling point or the biggest drawback. Penultimate has outstanding pen to paper feel, with the ink flowing smoothly across the page. It incorporates very, very good palm protection. Photos can be imported from either the iPad’s photo album or directly from the camera. Paper is limited to 3 styles, although additional styles are available for both free and via in-app purchase.

The main drawbacks to Penultimate are limited export opportunities. Entire notebooks or individual pages can only be exported as PDF files or as native Penultimate files and only through e-mail. Individual pages can be saved into the iPad photo album or printed via iOS capable printers. Overall, Penultimate is a beautiful app, accurately recreating the simplicity and presentation of a pen and paper notebook.

Note Taker HD.

Note Taker HD ($4.99) is perhaps the deepest of all these applications. The best of these features include the ability to select, cut and paste handwritten text, the ability to tag, flag and mark favorites for individual notes. Also, Note Taker HD can directly import PDFs and then mark them up. As with GhostWriter, this can be very handy for creating forms you want to fill out. Of course, to some extent, this inevitably results in duplicate data entry, the bane of the computing world. Note Taker HD also incorporates a zoom feature for creating handwritten notes. Again, this allows a great deal of detail and precision when writing in the Zoom box that is reflected on the full page.

The handwriting this passable, but not quite as smooth as Penultimate. Additionally, Note Taker HD lacks the ability to directly connect to Evernote. Finally, note taker HD is a somewhat complex piece of software is a trade-off for the depth of features. Although the layout is nice and presentable, it can be a bit offputting and somewhat counterintuitive at times as it diverges from standard IOS interface.

Noteshelf.

Noteshelf ($4.99) has truly amazing handwriting/pen and ink response. It also incorporates a zoom feature which allows, again, precision handwriting. The ink on the page is comparable to Penultimate. Noteshelf allows for palm protection to avoid inadvertent inking on the paper. The interface and layout is very iOS like, very intuitive, and customizable for lefty versus righty. There is a direct Evernote export. As well as Dropbox, iTunes, e-mail, iPad photo album, and print to iOS capable printers. Export format can be set to go as either individual images for each note page (which is the best way to export to Evernote as the handwriting will be recognized and then searchable) or as multipage PDFs. Page navigation is very nice and intuitive with a thumbnail drop-down for each page. Individual pages can be rearranged and reordered and individual pages can be moved/copied between different notebooks. Downsides to Noteshelf include the inability to import PDFs for annotating. Also, custom papers are, as with Ghostwriter and Penultimate, a separate in-app purchase for additional money. Photos can be imported directly from either the camera or the iPad’s photo album.

The big winner.

It’s a close call between Noteshelf and Note Taker HD. Note Taker HD has some superb features and is well worth considering if you need to fill out for right on top of an markup individual PDFs. However, if you want great inking ability, excellent export options, and ease-of-use note shelf is the way to go. If, on the other hand, you want to recreate as closely as possible plain ole’ pen and paper, go with Penultimate.

This is not an all inclusive list of note taking apps which use ink, just a review of those most frequently mentioned. Noterize sorta gets you there, and is free, but the inking isn’t that great although the app does do audio recording. Notes Plus is a nice effort, allows mixed typing and handwriting, as well as recording audio. But, the ink feel is a bit jerky, the export options and paper are both very limited as well.

A word about styluses (styli?).

Writing on the iPad with your finger will quickly become unbearable and unworkable. If you want to take handwritten notes, you will need a stylus. The Pogo ($10.98 Amazon) is workable, but has a spongy tip on it. The Kuel H10 ($12.99 Amazon) has an excellent tip which is nice and as precise as can be with a capacitive touchscreen such as the iPad has. Unfortunately, the Kuel 10 is also a stubby little bugger. I resorted to modeling mine by pulling the rubber grip off a regular pen and also extending the length by sticking an extension on the Kuel 10. Update: Received a Jot stylus from Adonit ($19.99) last night… by far and away the best stylus out there due to the length. Because it has a ‘hard’ tip, as opposed to the rubber and sponge of others, it does tend to make a tapping sound on the glass as you write. But, the Jot is a full-length, well balanced device. You ‘can’ make your own free Jot disc-style stylus if you have the time and DIY attitude (web page link, YouTube link). Why would you want to make your own? Because these things (stylii) get lost, because you want to use an old-well balanced pen you have lying around, because you’re cheap, because you’re a tech-head pioneer and slide rulers, pocket protectors and thick rimmed glasses have all gone out of style.