Essential Mac Apps

The best part about Macs is the ease of upgrading to new hardware. In the old Windows days, an upgrade to new hardware meant hours lost reinstalling applications, hunting down serial number and praying to the software licensing gods that there wouldn’t be some crazy limitation preventing you from installing software you already purchased on your shiny new computer. With a Mac, the ability to easily transfer an entire user environment (apps, data, settings) from the old hardware is dead simple.

But, recently, I came into possession of an iMac. Not having worked from a desktop in a very long time, I decided to do a clean install of OS X and then track which apps I was forced to install first.

The First Apps Installed On A Clean Mac

Notably, you can get quite a bit of work down without installing anything. OS X’s built in Mail, Calendar, Preview (reads PDFs) and Address Book get you up to speed fairly quickly, and for free. But, it also didn’t take long to start needing other stuff to get the job done quickly, and more comfortably. So, from first installed to last, here’s the list of essential Mac OS X apps used in my daily routine.

June 29, 2012: Update - I was just over at MILO and read New Jersey estate planning lawyer Victor Medina’s response listing his essential Mac apps. He included Dropbox and Alfred (or LaunchBar). I actually use both of those and, in fact, installed those early on but they so seamlessly integrate into my workflow that I forgot to include them on the list altogether.

1. BusyCal – Sync with just about anything and list view.
2. Moom – Getting windows set just right on the screen.
3. 1Password – Surprised this didn’t come in first, really. Tracks all your important passwords AND credit cards, driver’s licenses etc.
4. TextExpander – Too many joys to explain, from audience specific signature lines in emails to shortcuts for legal citations.
5. OmniFocus – When you get tired of spinning your wheels and going ten different directions at once, put some direction to your energy (just don’t put it all into micromanaging your ToDo list, a.k.a. know when to stop organizing what you need to do and start doing stuff.)
6. Pages – Because, eventually, you’ll need to write something with substance and formatted in an eye pleasing manner.
7. DEVONthink Pro Office – Heavy lifting, digging deep case and issue analysis.
8. Skitch – Screenshots, but importantly, screenshot filenames which tell you where the screenshot came from, including the page number of the PDF you were looking at when you took the screenshot.
9. Circus Ponies NoteBook – Collecting and building notes, depo outlines, thoughts, themes and exhibits, so that it can all get thrown together into a Trial Notebook.
10. Default Folder X – OS X’s continuing shortcoming? Finder. Fix it with this nice little utility that makes the finder truly useful, including the ability to add OpenMeta tags to files as you save them.
11. DEVONtechnologies Free Word Service – Ever need to delete bunch of line endings or change an ALL CAPS line to small caps? Go get this free utility to quickly and effortlessly manipulate text.
12. DEVONsphere – $4.99 on the app store. Get it and play with it. It can be a bit of processor hog, so set it on a weekly index schedule, preferably on a day you are not working.
13. OmniOutliner Pro – The old standby outliner. It is a great way to organize depo outlines and the standout columns feature allows you to sort by date, or do spreadsheet style calculations.
14. Parallels/WinXP (TextMap, WordPerfect) – Bleh. Occasionally you just get sucked back in… think of it as going into the storage room in the basement to pull some old file out of archives and then relish your return to the sunlit corner office of Mac OS X.

Do you have a ‘must install’ app not listed above? Tell us about it in the comments, including the ‘why.’

Awkward Breakup

A call came in the other day.

“Hey Pete, it’s Jerry.”

“Um…..”

“Jerry Raster… I used to work on the network and your computers at your office?”

“Oh! Hey Jerry, what’s up?”

“Well, I hadn’t heard from you in a long time and I was just wondering if I did something wrong last time, or maybe you found somebody else to work on your PCs….”

“Oh no no no. We switched to Mac.”

Long, awkward silence.

“So, um, yeah, since switching, we haven’t needed any tech support except for getting the Ricoh Copier/Scanner/Printer to play nice, but it’s on a lease so the vendor took care of that.”

“Oh. Mac?”

“Yeah.”

Long, awkward silence.

“Yeah, um, well okay. Talk to you later.”

DockView Shows App Thumbnails

Jealous of Windows 7’s ‘thumbnails’ that show up when the mouse hovers over an app on the task bar? DockView offers the same functionality, and more, for Mac OS X.  This great little app is only $7.99 and is free to try out with no limitations except an annoying and occasional ‘buy me’ window. The app plays nice with OSX’s Spaces so long as you switch to each Space and activate the app in that Space at least once.  So, if you have Preview PDFs open across three different Spaces, you can switch to them via the Dock thumbnail.  Additionally, when using Command-Tab, DockView also provides the pop-up thumbnail allowing quick switching for apps and windows. Finally, and better than Windows 7’s thumbnails, you can:

(1) alter the height and width of the pop ups; and, (2) pause, play and skip in the iTunes thumbnail. Genius and well worth the $7.99.

3 Reasons to Join MILO

MILO is the Google Groups forum “Macs In Law Offices.” Recently, there have been three reallyMILO Logo great posts by users on that forum.

  1. You can tether an iPhone to your Mac for internet access over the 3G network without hacking or jailbreaking. MILO user Christian Frank pointed everyone to www.benm.at. But, there are better instructions at mydigitallife.
  2. MILO user Grace Suarez revealed a superb Firefox plug in called CiteGenie. If you’ve ever struggled with getting a properly quoted and cited copy/paste from Westlaw or Lexis into your document, this plugin eliminates hassle, allowing you to focus on the legal and analytical aspect of your work. CiteGenie truly represents the goal of getting computers to do the grunt work so you can focus on higher reasoning skills.
  3. You cannot tether an iPhone with the new 3.1 software update, as hinted at by MILO user Rob Ruffner and confirmed by comments in the mydigitallife how-to.

MILO is a great place to learn and ask questions, a superb resource for any Mac using lawyer.

Switch Resources

If you are one of the lucky folks making the switch to Mac by way of a gift this year, you might want to check out these two really great resources. First, The Unauthorized Apple Weblog has a great line of posts on switching.  They cover everything in their Mac 101 series from Address Book to booting from a USB drive.

Then, of course, Apple has their own resource for switchers, Switch 101. It is a bit more basic, but much more organized the TUAW’s Mac 101 series. Finally, don’t forget that you can get your data migrated over from a PC with the help of a genius at an Apple Store Genius Bar… just remember to make an appointment before you go.

Finally, when all else fails, hit Google. The venerable search behemoth can probably point you in the right direction, especially if you use site focused searching. For example, don’t just hammer search terms in, but search a specific site (or even subsite) like this: 

site:http://www.apple.com/support/ itunes deauthorize

Typing the above will pull all references out of the support pages at Apple on deauthorizing computers from iTunes.

Happy Holidays!

A Gripe and A Fix.

Part of the Apple experience comes from aesthetics. The hardware to the software all look so good and make interfacing with a computer a more human experience, less geeky and, I believe, makes work more enjoyable… of course a stable OS goes a long way too.

But, Apple (and many other manufacturers) miss the boat by not including a ‘Pointing Stick’ style mouse in their laptops. Years of use with IBM laptops (now Lenovo) convinced me the convenience of a Trackpoint or Pointing Stick on the keyboard outweighed the ugly. Moreover, after adapting to Apple’s trackpad only configuration, I have wrist pain in my right wrist from mousing. Switching to a lefty mouser helps, but probably only forestalls the inevitable, pain developing in the left wrist.

Although not a full-time solution, there are available desktop USB keyboards with built-in Pointing Sticks which a Macbook will recognize, so that while at a desk, an alternative and wrist relieving option exists.

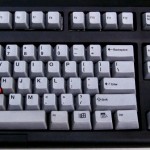
Lenovo sells a full-size Ultra-Nav USB Keyboard that has both a Trackpoint and Trackpad option built in. Because it has a Windows key (shudder), you still get your command key for the Mac. The keyboard also has additional USB ports so your not going to lose a USB port by plugging it in. It costs a measly $99 and, as an added benefit, you get that beautiful IBM snap on the keyboard, a huge benefit for any touch typist. If you really want to kick it old school, PCkeyboard.com sells an old style IBM keyboard, the Endurapro, that actually uses springs underneath the keys. This is that old-school clickety-clackety sounding keyboard, but those springs and the tactile feedback are much missed by many typing pros, authors, writers and geeks. The Endurapro does not, however, have additional USB ports but does have that ugly retro welcome to 1991 feel that you just can’t find anywhere else. It retails for $99 as well.

Format A USB Drive

Mac OS X, despite being one of the most intuitive and user friendly OSes on the planet, adopts a very obtuse procedure when it comes to formatting a USB drive. Every single time you get a new USB drive it comes formatted in FAT32. Of course, Time Machine will only work on a drive formatted as Mac OS X. So, pop open Disk Utility, select the drive and hit the ‘Erase’ tab… only to find out Disk Utility refuses to erase a FAT32 drive. Grrr. Instead of the ‘Erase’ tab, select the ‘Partition’ tab in Disk Utility, click the drop down for ‘Volume Scheme’ and select ‘1 Partition.’ Name the disk in the box provided and, on the drop down format box, choose ‘Mac OS Extended (Journaled).’ Hit the apply button, and a pop-up appears warning you that you are about to erase the disk (finally!) hit continue and you are on your way.

Case Analysis Using Journler – The Alternative Approach

Response to using the Applescript for Case Analysis led to some, ummm, issues to say the least. Some people don’t like the Applescript solution because it requires a full license for Adobe Acrobat Pro, others just can’t get the script to load and work properly. So, this last week, the workflow for using Journler in case analysis underwent a hard look and, surprise, surprise… sometimes things get more complicated than they need to be. In short, the following workflow eliminates the need for either Applescript or a full license to Adobe Acrobat and creates a simpler more efficient workflow as well. This entry will also go into more detail about setting up Journler itself, since there has been some confusion on that topic as well.

Occam’s Razor – Cut the script & the cost of Adobe.

The problem: You have a bunch of PDF files (some large, some small) numbering the hundreds or thousands of pages and we both know that there are only few relevant pages in there. The goal is to extract the nuggets of information and gather them in a single place so that they can all be viewed together, including the ability to see them in chronological order as well as filtered by issue, witness etc.

Pre-case analysis document preparation: The first, but not entirely necessary step, should be to OCR the documents. The second, and in my view, necessary step, Bates stamp those documents in a meaningful way. A good start might be to choose the first two letters from the adverse party’s names as the prefix. So, e.g., Smith v. Jones becomes SMJO000001 as a base bates number. You can get a bates stamper here which limits ‘batch’ stamping to 10 files at time if unregistered but is otherwise free.

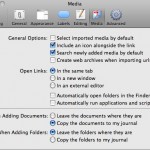
Pre-case analysis Journler set up: Journler Preferences>Media (Command-,) should be set up so that “When adding new documents: Copy the documents to my journal” is selected. This will ensure that the document will be copied into Journler, rather than an alias which might later get broken if the original file or folder gets moved. Journler Preferences>Advanced should be set to “Use drop box for fast imports.”

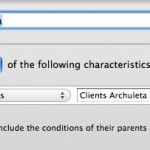
Smart folders should be set up in Journler which, at the very least, reflect the Client/Project Name on which you are working. Typically, I set up a main ‘client’ folder which requires that all items (and subfolders) have the Journler category “Client.” Then, each client gets their own smart folder which requires the client name in the in the Journler category field. You might also consider setting up a sub-folder under the client name to reflect a general category, such as ‘Medical,’ or whatever fits your purpose.

Case analysis: Open your PDF in Preview. When you get to that first ‘relevant’ document there are a number of options for getting it into Journler. If the page has OCR’d text, highlight the relevant text and hit Shift-Command-J. This will open a ‘new entry dialog’ pop-up for Journler. You can chose the ‘smart folder’ where you want to add a new entry and the entry will automatically be tagged and categorized per all requirements of the smart folder and the smart folder’s parent folders. In the example below, the new entry would be Categorized as “Client D__ R__” and tagged as “medical.” Downsides to this first approach include the need to have OCR text available on the page and the fact that the page/document itself does not get copied into Journler for later review. The second issue can be remedied by opening the side bar in Preview and literally dragging the image representing the page into the body of the Journler entry. The drag-n-drop method is nice because it mimics a typical law office workflow where relevant documents are picked out by an attorney and copied/added into a summary by a paralegal.

The second, and my preferred method, is that with the ‘relevant page’ in view, hit Command-c, then hit Command-n. This should open a new Preview window with the relevant page extracted and ready to be sent to Journler. Remember that the bates number is on there, and because Spotlight indexes those bates numbers, you can return to the document/page in its original context simply by typing the bates number into Spotlight. Now, to send this page to Journler hit Command-Shift-S to get the save dialog. Choose Desktop>Journler Drop Box. Doing so will bring up the same dialog as above, but now the page itself gets copied into Journler as a resource.

If you have more than one page, Preview will not allow you to create a ‘new’ document from multiple pages. The solution here is to hit Command-p (or print), choose the page range, then click on the “PDF” drop down in the print dialog and choose “Save to Journler.” This will import the full page range as a resource in a new Journler entry under the same dialog as above. Remember, to get the full print dialog allowing you to select individual pages, you need to click on the little blue down arrow next to the printer selection. Note that there are very few ‘clicks’ and most of the entry can be done using the keyboard, saving valuable time in mousing around.

Finally, and regardless of any of the above methods, hit ‘complete import’ and then switch to Journler. You can edit the “Created” date to reflect the actual date relevant to the entry, add tags, make notes in the body or whatever. You should also explore Journler’s powerful Lexicon feature (quite literally an index of every word in Journler and related entries) as well as Journler’s very powerful search and filter dialogs.

Obviously, this alternative approach is much simpler than the previous Applescript/Adobe Pro method and will work for any item that can be opened in Preview, including JPGs, TIFFS etc. However, since each of those items is often a single ‘page’ you might just want to drag and drop the item into Journler.

These methods readily grant the Mac using attorney the ability to not only replace Casemap, but to actually exceed Casemap’s analysis. Journler allows you to view multiple entries and cases at once, in multiple tabs. The full text search and free form approach also make it a breeze to customize your analysis well beyond the static limitations of Casemap. Because Journler encompasses all your cases, you are free to re-use information from other cases unlike Casemap’s one-case-at-a-time approach. Further, using Journler need not be the ‘overkill’ that some view consider Casemap to be. Because it can be as simple or deep as you need, Journler is a definite leap forward in case analysis as compared to Casemap.

Open Office 3.0 Beta

Open Office 3.0 Beta is now available for Mac. It is of note because, previously, to run Open Office on the Mac required X11 plug-in and, frankly, felt too clunky, slow and buggy to use. Even though Open Office 3.0 is still in beta, it is an appreciable improvement over 2.x. Took it for a short spin and it does a really great job opening Wordperfect documents, with correct text rendering on-screen, something which AbiWord still can’t seem to get right.

If you’re tired of trudging through AbiWord to open those Wordperfect documents, give Open Office 3.0 beta a spin.

Windows Collapsing on Itself?

I watched about a year ago as a lawyer was forced to switch his time and billing from a legacy DOS operation into Windows XP because staff could no longer print billing invoices. I may be an ‘early adopter’ for Mac in litigation use, but the extreme of hanging on to old technology out of laziness and fear seems much less appealing. However, for those who love legacy programs like that time and billing in DOS, you might want to read an article on ARS Technica detailing why Windows is slowly but surely dying. In nutshell:

Mac OS X draws “[c]onscientious developers, who care about making an application that looks good, works well, and exploits the capabilities of the OS… Windows [] has never struck me as being like that. The third-party software ecosystem for Windows is … incredibly shoddy. Most Windows applications—from both major software companies and minor ones alike—are ugly, poorly-thought-out, clunky pieces of crap. While there are a few artisan developers for Windows, most Windows devs just don’t care.

So, it is probably correct to say that more and more will ‘switch’ to Mac. The availability of Parallels and VMWare to run your ‘legacy’ Windows apps while transitioning makes it just that much easier. More than anything, virtualization brought me to switch. While ‘playing’ with Mac OS X, I became less and less tolerant of the Windows environment to the point that, well, I rarely boot up WinXP except when needed to get at some bit of information.

From Win32 to Cocoa: a Windows user’s conversion to Mac OS X